|
|
|
|
|
|
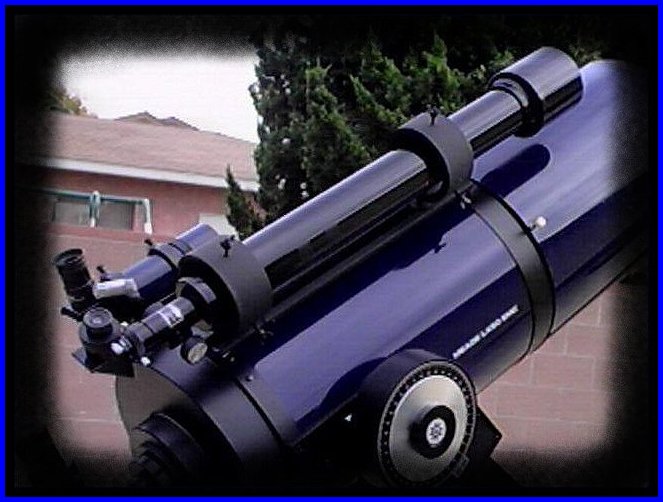
I got the polar alignment down pat and learned drift alignment quickly. I learned the PictorView software and practiced on the house across my street for a full week until I was ready to take on bigger challenges. Starting with some of the easier objects in the sky I started noticing that the off-axis guider was useless without major modifications. Not being able to get accurate guiding for more than 60 seconds really started to bug me until I noticed that Jordan Blessing had a tutorial on his site adding a 60mm refractor to his 8" LX50 for use as a guidescope. Since the 416XT system comes with the 201XT autoguider, I thought what better way to guide my way to longer exposure times! After checking my finances, the hunt for a refractor was on. Fry's, a local electronics super store, carries Meade and Celestron scopes, usually at out-landish prices but an ad in the paper one day caught my eye. A Celestron 60mm refractor for $69, regularly retailing for $129. Two hours later and Fry's was short one refractor in their inventory. The first necessary item and the most important was purchased. I had scored on a Celestron Firstscope 60! Once home, I separated the tube assembly from all the hardware that wasn't necessary for mounting. Now I had to locate suitable mounting rings for the scope and a system to attach the guide assembly to the OTA of the LX50. A quick trip to Home Depot and I had purchased a galvanized lighting strip with an adjustable sliding center plate for the wiring box. I discarded the wiring box but kept the sliding center plate. I also purchased various nuts, bolts and washers to fit the design of the mount as I envisioned it in my head. For mounting rings, I purchased heavy duty PVC pipe joints which the guidescope would just fit through. The lighting strip was in two pieces, one sliding inside the other to allow for length adjustment. The ends were squared which I quickly hack sawed off and filed smooth. I drilled a single hole for attaching the strip to the LX50 using small washers and the existing small bolts on the LX50. After attaching one end, I slid the other end of the strip to end of the LX50 and marked & drilled the end hole. |

|
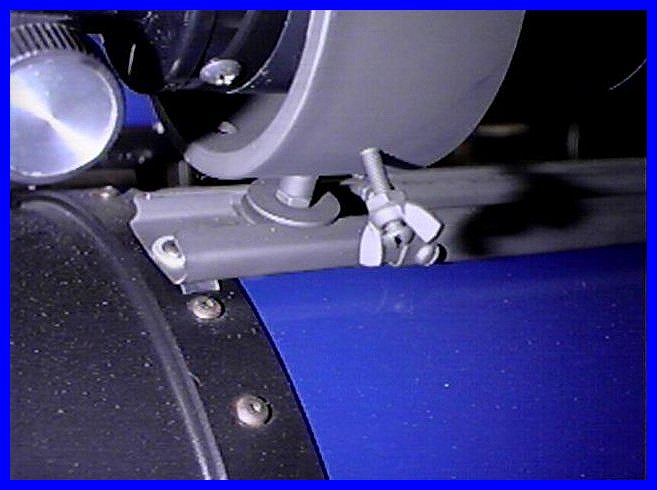
bolted the assembly together (see pictures above). Taking the adjustable sliding center plate which I saved, I hack sawed it into two equal pieces and used the existing studs to secure the mounting rings to the slide assembly using fender washers. Each PVC mounting ring was drilled & tapped at 120 degrees for the thumb screws. I was going to use hard plastic thumb screws but found they bent and twisted under the load of holding the guidescope. |
|
marring the guidescope. The mounting rings are very rigid but can be rotated when enough pressure is applied. The whole assembly was removed and painted flat black primer not only for looks but for weather and moisture resistance too. The whole assembly can be removed from the scope in ten minutes and remounted in the same amount of time. |


|
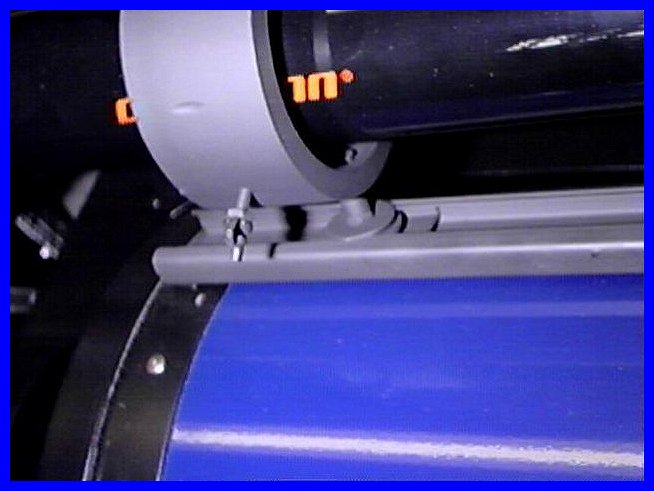
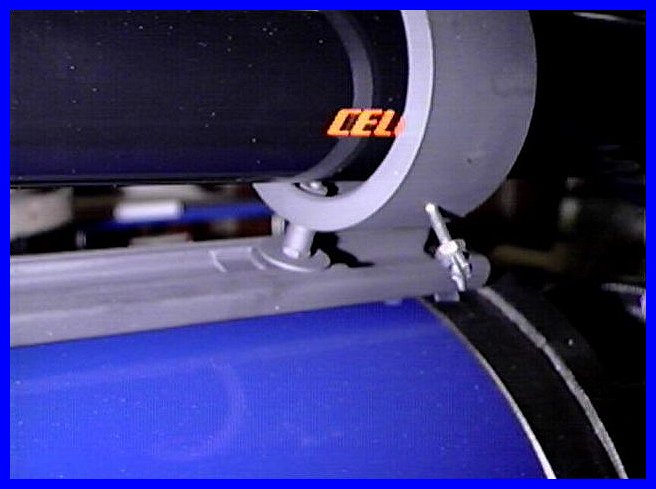
center portion across the LX50 OTA for stability. There is a generous amount of adjustment that can be made to the guidescope by use of slightly turning each mounting ring and by way of adjusting the thumbscrews. I have purchased a .965 to 1.25 inch eye piece adapter from Orion Telescopes to use the 201XT autoguider in a straight through mode. Since the Celestron Firstscope 60 is F/15, I use a 2X barlow in line with the autoguider to achieve a F/30 at 1800mm of focal length. |
|
|
|
|
CCD
ASTRONOMICAL IMAGES | tHE LX50 TELESCOPE |
LX50
HINTS & TIPS
ASTRONOMICAL
LINKS | CCD IMAGING TIPS | the
LX50 YAHOO GROUP
the
lx50 discussion forum