Basic Imaging

 
Imaging tips, techniques, and how to image using the 416XT CCD
camera and how to process them with PictorView & Epoch 2000ip.


Starting Out - Basic Imaging

Ok.... you purchased a scope and CCD camera or you just purchased a new CCD camera and now you want
to take images like those in the magazines. No one ever told you about the learning curve associated with
imaging. I found out the hard way when I purchase my complete system; telescope and CCD system. Being
I'm only familiar with the Meade products and software, I'll address those areas that I've learned first through
asking others, researched information on the Internet, or have learned through actual practice. This
information won't be perfect or complete but will help you to start taking images using the Meade
PictorView or Epoch 2000ip imaging software and your 416XT CCD camera. The experienced reader would
also be invited to e-mail me with additional or corrected information concerning anything posted here.

I hope to expand this listing in the near future with more hints and tips covering
everything from alignment, use of software, equipment tips, imaging techniques, etc...
as you can help by e-mailing your proven tips and hints so I can post them with credit to you.

I will assume that the reader owns his own scope or has access to one, knows how to observe, has or is about to
purchase a CCD camera and is ready to start imaging. I was totally confused as to how to start and purchased
a book from Amazon.com named "Introduction to Astronomical Image Processing" by Richard Berry. It also
comes with AIP245 software for the Cookbook 245 & 211 cameras plus the SBIG ST4, ST5, and ST6 cameras.
The reader should have a basic working knowledge of the imaging process and what each step will do to his hard
earned images. I would recommend any book that gives you detailed explanations on the processes. It will be
a big help to understanding what is happening and what you will see at each step of the process.
There are other excellent books out there and it is well worth you money to invest in a book.


What to Shoot First

You're all set up outside with everything ready for you to start imaging. What should your first target be?
Pick something nice and bright that will show mistakes easily for you to identify and correct.
The MOST IMPORTANT thing to imaging is...

FOCUS! FOCUS! FOCUS!

There are various ways and techniques to obtain a correct focus but the best is
going slow and steady, making sure of your focused image before spending large
amounts of time on imaging... finding blotted stars due to being out of focus.

I will use the Great Nebula in Orion, commonly know as M42 as an example to start imaging for those of you
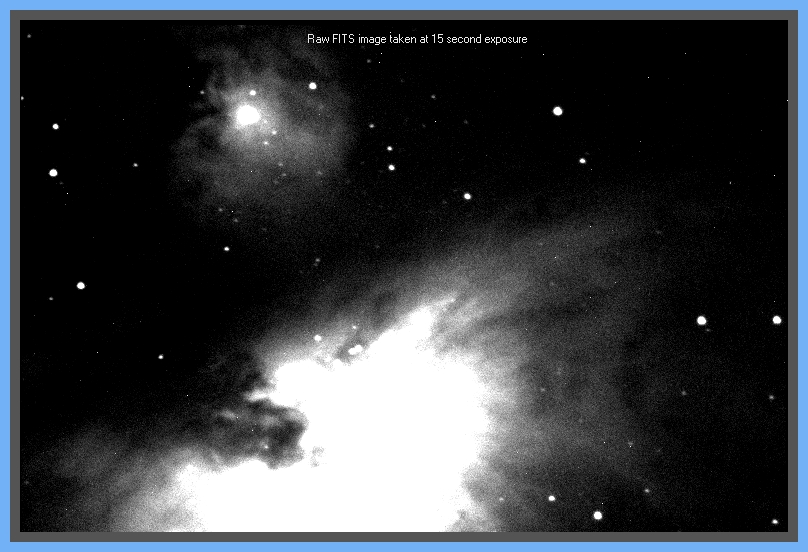
attempting your first time at this. I will assume you have the scope properly aligned, you know how to
operate the CCD and you're ready to shoot your first image. Assuming you can focus the image at this point
(We'll devote more discussion to focusing later), you decide to shoot your first frame at 15 sec exposure.

(See Image #1) This is a raw FITS image that shows a lot of detail plus noise from the camera. You decide
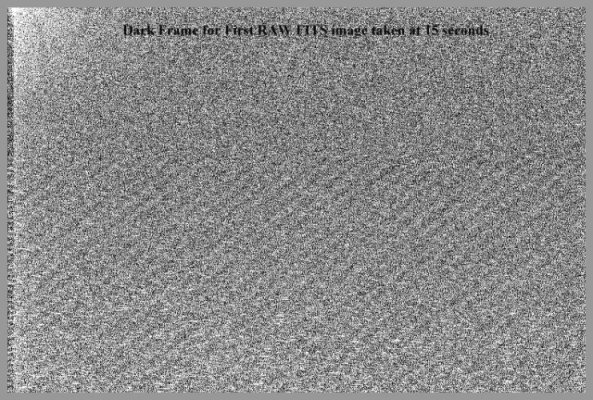
to process the current image so you must now take a dark frame to subtract the noise from the image.

You take another exposure (see Image #2) but this time you either cover the optics or as with the
416XT you image an automatic dark frame where the shutter will remain closed.
The image is a view of the noise in the CCD electronics and the heat effecting the pixels.

Image #1

Image #2


Image #3

Image #4


As a rule, when taking images you should keep a detailed log of each image. Most software packages have
routines that will handle this for you but you should develop a log for noting the object you're shooting, the file
name of each image saved (including your matching dark frames), the camera temperature of each image and
any comments you deem necessary for the imaged object. I shoot and store the images on one computer for
transfer to another computer for processing. This involves transferring large amounts of data and numerous
floppy disks. Each image also is rather large (mine average around 800k) and drive space will disappear quickly.
Your file log system must be able to match your images with the matching dark frames and provide the
image information to enable you to process the image. Otherwise, you'll end up frustrated!

Now 
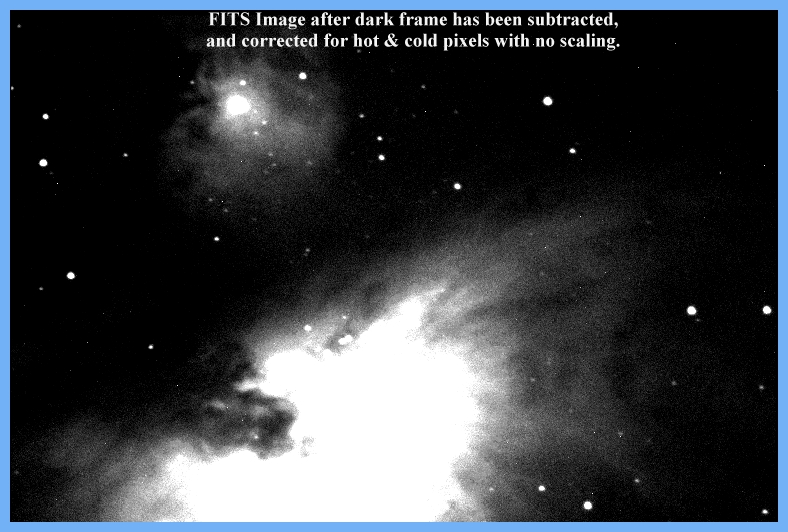
you have a raw FITS image and a matching dark frame. The first step is to subtract the dark frame from
the image. This in effect, is subtracting the noise from the image. In PictorView, the routine is easy and simple.
You simple open your image, tell the program to subtract the dark frame from the active image and the routine
asks for certain information. You must chose the name of the dark frame file to subtract from the image.
You must provide the exposure time for both the raw image and the dark frame. You must also enter the
camera temperature for the raw image and the dark frame. You must decide if you want the routine to
correct hot and cold pixels and then decide if you want automatic scaling. I would recommend not using
automatic scaling as you can exercise more control by doing it yourself than having the program do it for you.

Allow the routine to process the dark frame subtraction and your new image (See Image #3) is ready for additional
processing. Save your image as this point but with a slightly different name than the original. Never process the original
unless you keep a copy in another directory! The final step of this basic process will be to scale the image.

Scaling the image adjusts the range and background saturation of the pixels. In the PictorView program,
image scaling is fairly easy as the program gives you the low and high values to set for the background
and range. For the first timer, it's best to use the values shown to see the detail in the image.
The final processed image (See Image #4) has it's values set to 258 for the background and 3927 for
the range. As you can see, there's a lot of hidden detail in the center of the nebula. You can experiment
with the settings to bring out the detail you desire. The M42/M43 image on the Gallery page is set at 258 for the
background and 1500 for the range. Also the gallery image is a stacked image using six individual images.

These are the basics with which you can start. Foremost, purchase a suitable book on imaging and experiment
with your images. There will be additional sections added to this site for more advanced techniques.


Back

CCD ASTRONOMICAL IMAGES | tHE LX50 TELESCOPE | LX50 HINTS & TIPS
ASTRONOMICAL LINKS | the LX50 YAHOO GROUP
the lx50 discussion forum